• Skip to primary navigation
  • Skip to main content
  • Skip to primary sidebar
  • Skip to footer

Marge Perry's A Sweet and Savory Life

  • Recipes
  • Articles
  • Calendar
  • About
  • Contact

Mother’s Day with Lake Austin Spa Resort

May 14, 2018 By Marge Perry 4 Comments

Mother’s Day. A day of remembrance and sadness for so many of us whose mothers are no longer here. And also a day, for so many of us with children, when our hearts swell so big the love bounds out like Tigger on a tear.

I am at Lake Austin Spa Resort this Mother’s Day. This place has been a part of being my mother’s daughter and my children’s mother for more years than I can count. It is where I learned to meditate when my children were young and I was a newly single parent.

I was going through a horrible divorce. My husband had left one year before, on the week of my daughter’s and my birthday. My kids were going to spend Christmas with him and I would be alone. …

Read More »

Filed Under: Recipes, Seafood and Fish

How to Get Rid of Stinky Fish Smell in Your Kitchen

May 1, 2018 By Marge Perry 4 Comments


Did you wake up to the scent of last night’s fish dinner? Or worse, come home after a long day only to be greeted by the smell of dead fish?

First, here’s what not to do: do not light a scented candle. Doing so will produce the same cacophony of odors French prostitutes in bygone days created by dousing themselves in cheap perfume. You just don’t want to go there.

Don’t blame the scent on bad fish. Even good fish can make your house smell, well, fishy. It’s also not a matter of bad cooking technique, so don’t blame yourself. If you feel a strong need to blame someone, put it on the Kitchen Witch. She clearly didn’t have your back.

I do, though. I am going to tell you how to get rid of that nasty odor– and also how to hedge your bets against it happening again. (No guarantees on the latter, but it will help.) This solution for eradicating the smell really works, albeit with a small, innocuous side effect.

After you cook fish, bring about an inch of white vinegar to boil in a small saucepan. Reduce the heat and let it simmer, just vigorously enough that the vinegar gives off a decent amount of steam, for about an hour. The side effect is that your house will smell like a salad for a an hour or two, but salad smell is clean and fresh, and far preferable to fish smell. It is well worth noting that this also works to cut that headache-inducing odor after you’ve painted your house. Sadly, I can tell you from personal experience that it is ineffective when your dog has been skunked.

Now, you also want to do everything you can to prevent that smell. As I said above, it is not a guarantee, but to help avoid smelling up your house when you cook fish, be sure to open a window or start your fan BEFORE you start cooking. Otherwise, that odor has a chance to linger; to settle in to all the nooks and crannies of your kitchen. Like certain houseguests, it is best to not let it get too comfortable in the first place.

Now that you know how to conquer the dreaded Stinky Fish Smell, you will want to run right out and cook some fish. Below is a robustly flavorful, healthful salmon dish that you can make in less than 15 minutes. And just think, your house will smell fresh as a spring salad.

Before you go, a few quick updates. As we are madly working on getting the manuscript for our upcoming book, Hero Dinners, to our editor by July 1st, we have also created a couple of new social media venues. Take a look at the food we’re creating for the book (and other stuff, too) on Instagram at @HeroDinners, and our joint Marge Perry and David Bonom Facebook page Please follow and join our journey!

Also, as long as you are now on cooking fish and seafood, I would suggest you to try this recipe for Mussels in Coconut Chili Broth we created for Anolon. It is one of my two favorite ways to eat mussels: this is the other.

Print Recipe
Salmon on Ginger-Jalapeno Tomato Sauce
Servings 4
  • 4 (6-ounce) salmon filets, skin on
  • 3/4 teaspoon salt divided
  • 1/8 teaspoon black pepper
  • 1 tablespoon canola oil
  • 1 medium onion, chopped (about 1 cup)
  • 1/2 jalapeno, sliced (core and seeds removed)
  • 1 tablespoon minced ginger
  • 1 (14.5-ounce) can crushed tomato
  • 1 teaspoon honey
  • 2 tablespoons coarsely chopped cilantro
  1. Season the fish on both sides with ½ teaspoon of the salt and the pepper. Heat the oil in a large nonstick skillet over medium high. Add the fish, skin side down, and cook until the skin is golden and well crisped, about 5 minutes. (The fish will not be cooked through). Transfer to a plate.
  2. 2. Add the onion, jalapeno and ginger to the pan; cook, stirring, 2 minutes until somewhat softened. Add the tomato, honey and remaining ¼ teaspoon salt and cook, stirring occasionally, until thickened, about 5 minutes. Place the fish, skin side up, on top of the tomato and gently simmer until the fish is cooked to the desired degree of doneness, about 5-7 minutes. Just before serving, sprinkle with the cilantro.
Recipe Notes

363 calories, 41 g protein, 13 g carbohydrates, 3 g fiber, 16 g fat, 2 g saturated fat, 714 mg sodium

Filed Under: Fast and Easy, How-To, Recipes, Seafood and Fish

Matzo Rosti for Passover Breakfast, Lunch or Dinner

April 1, 2018 By Marge Perry Leave a Comment


You do not have to be Jewish to love, eat or cook with matzo. Similarly, you do not have to be Christian to love chocolate bunnies and jelly beans. I know this.

For Jews who keep Passover, the bunnies and jelly beans are currently off limits, but this wonderful dish, which I am calling matzo rosti, is definitely in keeping with the laws of Passover.

…

Read More »

Filed Under: A Sweet and Savory Life, Breakfast and Brunch, Egg Dishes, Meatless Mains, Recipes Tagged With: matzo, Passover

Chili Meets Mac and Cheese: A Perfect Game Day Marriage

February 4, 2018 By Marge Perry Leave a Comment

Once upon a time, Chili sat in his pot, thinking to himself, “There must be more.” He had heard about this thing called love, and longed for it, but the closest he’s ever come was a few flings when folks sprinkled cheese– or sometimes salted crackers– over him. Yes, he loved how those small additions made him see himself in clearer light: how their differences brought out something new in him, and how he felt more, well, complete when they were there. He was just one of those guys, he supposed, who was really at his best he was with the right Other. But the crackers were a little dry and stiff for him; they didn’t seem to know how to have fun. And the cheese– well, she was a bit too easy: she’d just go and drape herself anywhere, showing off her creamy, languid lusciousness to anyone and everyone.

And then one day, as he was sitting on the stove, pumping himself up for Game Day, (and all the while, deep down inside just wishing he had someone with whom he could share this VERY BEST DAY OF THE YEAR), a tingling sensation simmered through his every little meaty bump….

Read More »

Filed Under: Beef, Pork and Lamb, Grains and Starches, Great for Gatherings, Pasta, Recipes

Dinner and Dessert

January 29, 2018 By Marge Perry 3 Comments


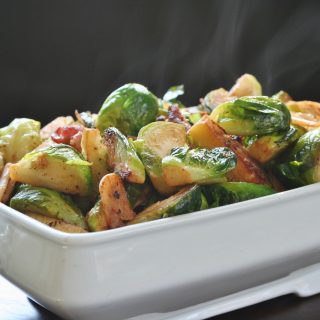
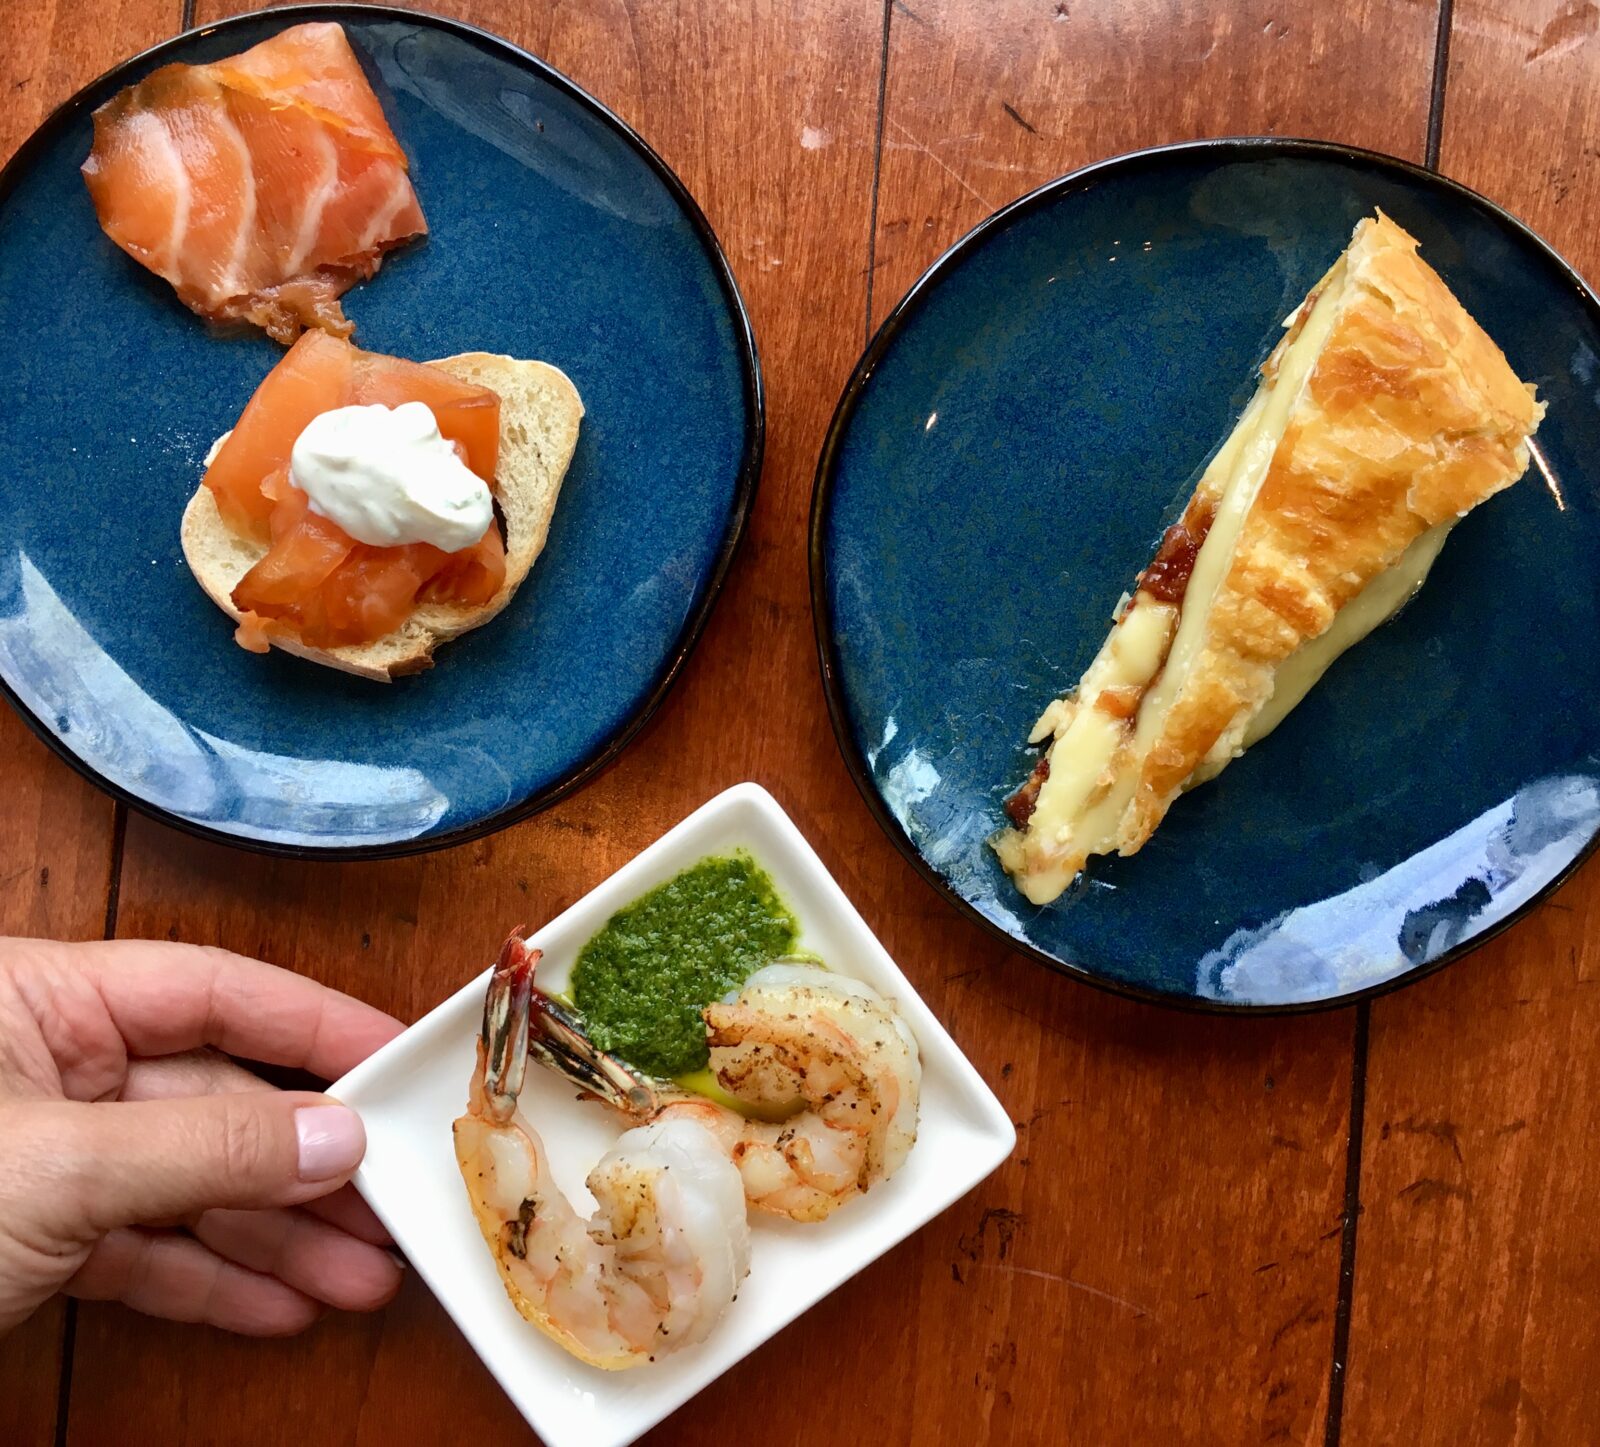
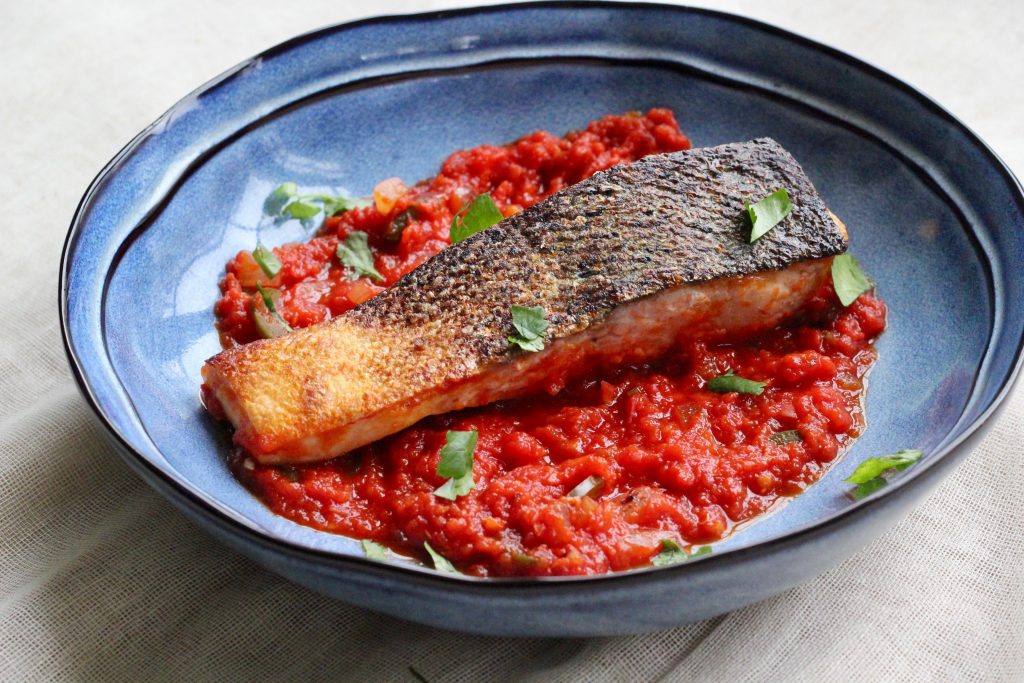
It’s been a while since we’ve met up, here on this page. I haven’t stopped cooking, of course. Actually, quite the opposite is true. We’ve been hard at work on our new book (due out around Spring of 2019, which seems unbearably far away, given that our deadline is July 1st!). We are creating over 100 recipes that will swoop in and save (every)day for you: the book is called Hero Dinners, and each and every meal is made in a single sheet pan or a skillet. (We’ve just started an instagram page, too: @herodinners. Come join us there!). Just think, dinner with no timing to worry about, and only one pan to clean at the end of a long day. But the book won’t be published for a while still, so perhaps you’ll be more interested in some of our recipes you can get right now.

We just did a project for Anolon and Williams-Sonoma for which we created dishes that highlighted the attributes of several specific pans. On one level, my favorite dish was the Cardamom Pear Tarte Tatin pictured above, because…well, because it is dessert, and I love good dessert. (I also love pears and cardamom. And David’s flawless, simple pie crust dough.)

But this Miso Soy Braised Chicken with Winter Earth Vegetables may win out even over dessert. (Can you imagine?!) It is wonderfully soothing, subtly sweet and salty: it is what comfort food served to royalty in a palace must be like. I have thought of and yearned for this serene dish many times since we’ve made it. Pity me, please, because since then we have been too busy creating new dishes to make this one again. But you lucky souls out there are not in that position, so by all means, make this one-pot complete meal. …

Read More »

Filed Under: A Sweet and Savory Life, Desserts, Poultry: Chicken, Cornish Game Hen, Turkey and Duck, Recipes

Brussels Sprouts with Bacon

November 15, 2017 By Marge Perry Leave a Comment

To make these Brussels Sprouts ahead, slightly undercook them the day before—they should still be a little crunchy and slightly raw looking in the very center. Reheat (which will finish the cooking) just before serving in a large skillet on the stove or in a buttered, covered baking dish in the oven.

By the way, sautéed Brussels sprouts are clearly not just for Thanksgiving. They are one of my go-to vegetable dishes all fall and winter long. When I make just one container on a busy weeknight, I simply sauté them in olive oil and season with a squeeze of lemon juice, salt and pepper.

Print Recipe
Brussels Sprouts with Bacon
Servings 8
The directions below call for using only one skillet and browning the Brussels sprouts in batches, but if you don't mind cleaning an extra pan, you can save time by cooking them all at once in two skillets.
  • 8 slices bacon
  • 1 tablespoon olive oil
  • 10 cloves garlic, thinly sliced (lengthwise)
  • 3 pint containers Brussels sprouts, (about 27 ounces total)
  • 1/2 cup low sodium chicken or vegetable broth
  1. Cook the bacon in a large nonstick skillet until crisp. Transfer to a plate lined with paper towel; chop in 1/2-inch pieces when cool.
  2. Pour off all but a thin coating of the bacon fat from the pan. Add the oil to the bacon drippings in the skillet and heat over medium high. Add the garlic and cook, stirring, until lightly golden, about 1 minute. Add half the Brussels sprouts and cook until lightly browned on the underside, about 4 minutes. Remove from the pan and, first adding up to a tablespoon of oil if the pan seems dry, add the remaining Brussels sprouts, again cooking until lightly browned, about 4 minutes. Return the first set of Brussels sprouts to the pan (all are now in the pan together), add the chicken broth and cook, stirring occasionally, until the Brussels sprouts are crisp-tender, 10-12 minutes. Remove from heat and stir in chopped bacon. Add salt and pepper to taste.

Filed Under: Fast and Easy, Great for Gatherings, Recipes, Side Dishes, Vegetables

Three Ridiculously Delicious Do-Ahead Appetizers

November 15, 2017 By Marge Perry 2 Comments

We all need do-ahead nibbles to get the party (or holiday feast) started. In honor of that need, and the fact that Thanksgiving is right around the corner, we showed attendees at The Lodge at Woodloch (a beautiful spa in Hawley, PA) how to make three we especially love: Seared Shrimp with Italian Salsa Verde; Tequila Cured Gravlax; and Baked Brie with Bacon Apple Jam. Don’t make me pick my favorite.

Below are the three recipes, along with notes about how far and to what point each may be made in advance. Happy Thanksgiving!

Print Recipe
Seared Shrimp with Italian Salsa Verde
Servings 10-12
Italian Salsa Verde is very different from its Mexican cousin: it is a blender sauce made with anchovies, capers, and lots of parsley and basil. It is as good on simple roasted fish and poultry as it is with shrimp. (And, in fact, I have been known to simply spread it on a cracker.)
  • 1/2 cup + 2 tablespoons extra virgin olive oil divided
  • 1 garlic clove,
  • 1 cup packed flat leaf parsley leaves
  • 1/2 cup packed basil leaves
  • 2 tablespoons drained capers
  • 1 1/2 tablespoons lemon juice
  • 2 oil-packed anchovy fillets
  • 3/4 teaspoon salt divided
  • 1 1/2 pounds peeled, deviened large shrimp (size is 16-20 per pound)
  • 1/4 teaspoon ground black pepper
  1. Combine 1/2 cup of the olive oil, garlic clove, parsley, basil, capers, lemon juice, anchovy fillets and 1/4 teaspoon of the salt in the blender and puree. The sauce may be made 3 days in advance and refrigerated.
  2. Combine the shrimp with the remaining 1/2 teaspoon of the salt and the pepper.
  3. Heat 1 tablespoon of the remaining oil in a large nonstick skillet over medium high. Add about half the shrimp in a single uncrowded layer and cook about 2 minutes. Turn and cook until lightly browned and opaque, about another 1-2 minutes. Repeat with the remaining oil and shrimp. The shrimp may be served warm or cooked several hours in advance, refrigerated and brought to room temperature to serve.


Print Recipe
Tequila Cured Gravlax
Servings 12 -14
The salmon must be cured for at least 48 or up to 72 hours. It can be rinsed off but not sliced 1-2 days before serving, but is best sliced the day of serving. Serve with crackers, flatbread or toasts and accompany with a topping made from sour cream, finely chopped chives and lime zest.
  • 2 teaspoons smoked paprika
  • 1 teaspoon ground chipotle chili powder
  • 1 teaspoon ground cumin
  • 1 (2 1/2-pound) skin on salmon filet (center cut, not from the tail end)
  • 1/2 cup chopped cilantro
  • grated zest from 2 limes
  • 3/4 cup packed light brown sugar
  • 1/2 cup kosher salt
  • 6 tablespoons tequila
  1. Combine the paprika, ground chipotle and cumin in a small bowl.
  2. Cover a rimmed baking sheet pan with plastic wrap. Place the salmon, skin side down, on the plastic. Spread the spice blend evenly over the top of the salmon. Sprinkle the cilantro and lime zest over the spice blend.
  3. Combine the sugar, salt and tequila in a bow and pat the resulting paste evenly over the top surface of the fish. Fold up the edges of the plastic wrap over the top of the fish and top with another piece of plastic wrap.Top the fish with a second sheet pan to weight it down, and then place several heavy cans, a heavy skillet, or a piece of slate on top of the second sheet pan. Refrigerate 48-72 hours. (No more or less.)
  4. Remove the salmon from the pan and plastic wrap. (It helps to do this over a sink, as there will be a lot of liquid). Rinse the fish under cold water to completely remove the coatings. Pat the fish dry with paper towels and place on a cutting board.
  5. Cut the salmon across into very thin (1/8th-inch) slices, down to, but not including, the skin. (After the salmon is completely sliced, discard the skin).


Print Recipe


Baked Brie with Bacon Apple Jam

Servings

Not only does everyone gravitate to cheese covered in golden, flaky puff pastry-- because cheese + pastry is as good as it gets-- but the filling is a game changer. And, if all that weren't enough, this is an incredibly impressive looking, show-stopper of an appetizer.

  • 1 pound hickory smoked bacon, finely chopped
  • 1 Granny Smith apple, peeled and finely chopped
  • 3/4 cup chopped onion (about half a medium onion)
  • 1 cup apple cider
  • 1/2 cup apple cider vinegar
  • 1/3 cup packed brown sugar
  • 1/4 cup apple jelly
  • 1/4 teaspoon ground cinnamon
  • 1/8 teaspoon cayenne pepper
  • 1 (17.3-ounce) package frozen puff pastry, thawed
  • 1 2.2-pound (1 kilo) whole Brie cheese wheel, chilled
  • 1 large egg, lightly beaten

  1. Make the jam:cook the bacon in a large nonstick skillet over medium heat, stirring occasionally, until lightly browned, about 15 minutes. Transfer to a plate lined with paper towel and drain. Pour off all but 1 tablespoon of the bacon fat from the skillet.

  2. Add the onion and apple to the pan and cook, stirring often, until softened, about 4-5 minutes. Stir in the cider, vinegar, sugar, jelly, cinnamon and cayenne and increase the heat to medium high to bring to a boil. Cook, stirring, 2 minutes; add the bacon, reduce the heat to medium and cook, stirring occasionally, until the mixture is syrupy and thickened, about 30 minutes. (When it is thickened, a spoon drawn across the pan surface will leave a line that takes time to close back up.) Allow to cool completely. (The jam may be made a week ahead and kept refrigerated).

  3. Working on a lightly floured surface, roll 1 pastry sheet into a 13-inch square. Transfer to a baking sheet pan lined with parchment.

  4. Cut the chilled cheese horizontally in half. Set the bottom half in the center of the pastry sheet, cut side facing up. Spread the jam evenly over the cut surface and place the top half of the cheese, cut side facing down, on the jam. Wrap the dough up and over the cheese, stretching it as needed to just come over the top edge. (It won't cover the top.) Brush with some of the egg.

  5. Roll out the second sheet of pastry to a 13-inch square and drape it over the top of the cheese. Tuck the ends under the cheese. (You can trim the pointed corners before tucking and use them to cut out decorate leaves or flowers for the top of the Brie if you are so inclined.) Brush the pastry with egg, top with decorative shapes if desired and brush those with egg. Refrigerate, uncovered, 30 minutes. (You may prepare the brie to this point up to three days ahead.)

  6. Preheat the oven to 425F. Bake the cheese until it is golden brown and puffed, about 20-22 minutes. Allow to cool at least 20 minutes before serving. The cheese may be baked one day before serving.


Recipe Notes


Filed Under: Appetizers, Hors d'oeuvres and First Courses, Great for Gatherings, Recipes, Seafood and Fish

How to Time Thanksgiving Dinner

November 13, 2017 By Marge Perry Leave a Comment


Even on Thanksgiving, timing is everything. (Okay, not really everything— because certainly the most important part is that everyone is together.)

Last week I taught my annual “Thanksgiving Essentials” class at the Institute for Culinary Education, and when I asked students what their biggest concern with hosting Thanksgiving is, timing was at the top of their list. How to know when the turkey is cooked to the perfect point of doneness was a close second.

I’ve got you covered.

Timing

First, choose recipes that can be done entirely or mostly in advance.

  • Most casseroles can be made entirely ahead and reheated. The beauty of roasting that big bird is that after it comes out of the oven, it must rest about 20-30 minutes before you carve. That is the perfect time to put your sweet potato and other casseroles in the now-empty oven to reheat.
  • Many vegetables can be slightly undercooked ahead of time, then can be finished as they are reheated. My favorite two ways to reheat Thanksgiving vegetables are 1. in a skillet on the stove. This works especially well with slightly undercooked green beans. 2. In the microwave. I do believe this is one of the very best uses (besides melting chocolate and butter) for the microwave: place the vegetables in a pie dish, and drape loosely with a damp cloth. If you have a lot of vegetables, do it in batches, transferring the vegetables to a warm covered serving dish.

Pay attention to your serving dishes.

  • Don’t wait until you are ready to put dinner on the table to start pulling out your platters and utensils. Take out every platter, bowl and serving utensil you will need, and mark it with a small post-it note with the name of the dish for which you will use it. That way, you needn’t scramble once the food is cooked, scrounging around your cabinets and drawers while the food either over cooks or gets cold.
  • That brings me to getting food to the table hot. One neat trick is to run your plates through the rinse cycle of the dishwasher. Leave the dishwasher closed until you are ready to use them. Warm plates keep the food hotter for longer. Place them on the buffet with a pretty cloth draped over them right before you bring the food out.

Don’t trust yourself to remember every detail. (Talking to your adorable nieces and nephews is one of the great pleasures of the holiday– don’t miss it because you are afraid of forgetting to do something.)

  • Keep a list on the counter of the dishes you are serving. That way you won’t accidentally leave the cranberry sauce in the refrigerator or the potatoes in the oven. I speak from experience here.

Cooking the Turkey Perfectly

Every year, all of us food writers are required by our editors to come up with the glorious new way of cooking a turkey. The truth is, the classic method of roasting a turkey in the oven can produce great results. The biggest impact on serving a turkey that is tender and not dry, cooked enough to be safe, but not so much that it must be drowned in gravy in order to be palatable, is cooking to temperature.

Here is everything you need to know about how to take a turkey’s temperature, with a photographic guide.

Serving the Turkey: How to Carve

Here is the key: remove the leg and thigh, then the breast. Once you take the entire breast off the turkey, it is easy to get beautiful, even slices. Do not try to carve the breast on the turkey. You will end up with shredded, meat, and it will take you much longer. Here is a step-by-step photographic guide to carving your turkey.

Finally (for now), here are a bunch of recipes for turkey that we created for magazines, websites and corporations.

Wet Brine and Dry Brine Tutorial for Food Network

Cider Bourbon Glazed Turkey (for Circulon)

Spatchcocked Turkey (for Anolon)

Here is my Thanksgiving Pinterest board where you will find links to more of our recipes

This is page of our Thanksgiving recipes put together by California Olive Ranch.

Here are Six Do-Ahead Side Dishes

And here is my absolute favorite Thanksgiving dessert, Pecan Caramel Tart with Sea Salt Crunch


Print Recipe
How to Time Thanksgiving Dinner
Servings
Servings

Filed Under: Great for Gatherings, Poultry: Chicken, Cornish Game Hen, Turkey and Duck, Recipes, Side Dishes

Green Spider Eggs (aka Avocado Deviled Eggs with Olive “Spiders”)

October 29, 2017 By Marge Perry Leave a Comment

I hate creepy crawly things. (That is, I despise them when they venture into in MY space. When they are outside, I keep a respectful, non-hating distance). But I do love eggs, avocado and olives– and I do really love to play with my food. Thank you, Halloween, for my annual reason to make food look gross.

Also: avocado in deviled egg filling makes this world a better place. And: these are a whole lot healthier than all that Halloween candy. Check out the nutrition numbers at the bottom of the recipe, but don’t tell anyone they’re good for you– it isn’t in keeping with the Halloween spirit.


Print Recipe
Green Spider Eggs (aka Avocado Deviled Eggs with Olive "Spiders")
Servings 8-12 (24 pieces)
  • 12 large eggs
  • 1 small avocado
  • 1/4 cup canola mayonnaise
  • 1/2 teaspoon Dijon mustard
  • 1/4 teaspoon salt
  • 3 tablespoons sweet relish
  • 25-30 canned black olives
  • 1/2 teaspoon tomato paste
Servings 8-12 (24 pieces)
  • 12 large eggs
  • 1 small avocado
  • 1/4 cup canola mayonnaise
  • 1/2 teaspoon Dijon mustard
  • 1/4 teaspoon salt
  • 3 tablespoons sweet relish
  • 25-30 canned black olives
  • 1/2 teaspoon tomato paste
  1. Place the eggs in a large pot with enough water to cover them by 2 inches and bring to a boil. Immediately remove from the heat, cover and allow to stand for 13 minutes. Drain and rinse under cold water to stop the cooking.
  2. Meanwhile, place the avocado in a bowl and mash with a fork until fairly smooth. Add the mayonnaise, mustard, salt, and pickles and stir to combine.
  3. Peel the eggs and sliced lengthwise in half; remove the yolks and place them in the bowl with the avocado mixture; mash until fairly smooth.
  4. Place the whites, cut side up, on a platter. Fill a plastic bag with the avocado mixture and snip one small corner off. Push the filling towards the corner and pipe the mixture into the egg whites.
  5. Quarter 6 of the olives lengthwise for the spider bodies; place on top of the avocado mixture. Cut about half the remaining olives in half lengthwise, and cut those halves across in very thin slices for the legs. Place 4 on each side of the spider bodies. Repeat until all spiders have their 8 legs.
  6. Place the tomato paste in a small plastic bag and make a tiny snip in one corner. Pipe red eyes on the spiders. Alternatively, use a toothpick to drop the tiny red eyes on the olives.
Recipe Notes

Nutrition per each egg half: 59 calories, 3 g protein, 2 g carbohydrates, 4 g fat, 1 g saturated fat, 122 mg sodium

Filed Under: Appetizers, Hors d'oeuvres and First Courses, Breakfast and Brunch, Egg Dishes, Great for Gatherings, Recipes

Pomegranate Roast Chicken with Potatoes and Carrots (An Easy Sheet Pan Meal)

September 18, 2017 By Marge Perry Leave a Comment

It isn’t summer any more. I know that because when I wake up in the morning I snuggle deeper under the covers against the cool breeze; and because the world turns a particular September shade of golden in the late afternoon; and I know summer is gone because I’ve begun to think about squash and apple picking and making big pots of soup.

It is a fact of life that my work as a food writer often pushes me far away from the seasons. I work on Thanksgiving stories in April (and invite friends over to share our autumnal feast on Tax Day); I make patriotic strawberry-blueberry shortcakes in January; and in July my oven works its mighty magic for hours to produce succulent Christmas roasts. But I still feel, smell, hear and see the seasons as they truly are.

Right now, in the middle of September, I am not ready for gargantuan cuts of meat, but zucchini and corn are old news. I’m happy to zig-zag across seasons with chicken, herbs from my garden, and fall-ish vegetables like carrots and potatoes.

Print Recipe
Pomegranate Roast Chicken with Potatoes and Carrots (An Easy Sheet Pan Meal)
Servings 6
  • 1 tablespoon olive oil
  • 1 tablespoon fresh chopped rosemary
  • 2 garlic cloves, finely minced
  • 3/4 teaspoon salt
  • 1/4 teaspoon black pepper
  • 2 1/2 pounds chicken thighs
  • 1 1/2 pounds potatoes, scrubbed and cut in small wedges
  • 8 ounces baby-cut carrots
  • 2 tablespoons pomegranate molasses*
  • 1/4 cup lower sodium chicken broth
  • 1 tablespoon lemon juice
  • 1/2 teaspoon lemon zest
  • 3 tablespoons brown sugar
  • 1/8 teaspoon ground cardamom
  • 1/4 teaspoon ground coriander
  • 1/4 teaspoon ground ginger powder
  • 1 teaspoon corn starch
  1. Preheat the oven to 425 degrees. Coat a shallow baking sheet pan with cooking spray.
  2. Combine the olive oil, rosemary, garlic and salt in a large bowl. Add the potatoes and toss thoroughly. Add the chicken and carrots and toss until evenly coated.
  3. Spread the potatoes and carrots out on the baking sheet; place the chicken on top. Roast in the center of the oven until the chicken and potatoes are lightly browned and cooked to an internal temperature of 160 degrees, about 35 minutes.
  4. Meanwhile, combine the pomegranate molasses, broth, lemon juice and zest, sugar, cardamom, coriander and ginger in a saucepan and bring to a boil. Continue boiling 3 minutes. Combine the cornstarch with 1 teaspoon water in a small bowl; stir into the sauce and boil 1-2 minutes until the sauce is thick and glossy. Brush over the chicken and return to the oven for another 5 minutes, until the chicken is glazed and reaches an internal temperature of 170 degrees, about another 5 minutes.
Recipe Notes


422 calories, 29 g protein, 34 g carbohydrates, 3 g fiber, 19 g fat, 5 g saturated fat, 447 mg sodium

*Pomegranate molasses is a sweet-tart syrup that bears no resemblance to molasses other than in texture. It is robustly flavorful, so you generally use just a couple of tablespoons at a time, but it keeps in the refrigerator indefinitely. It is available at Whole Foods, in many specialty stores and in some grocery stores. This is the brand I buy.

Filed Under: Fast and Easy, Poultry: Chicken, Cornish Game Hen, Turkey and Duck, Recipes

How to Keep Fish From Sticking to the Grill: A Simple Genius Fix

July 26, 2017 By Marge Perry 6 Comments

It’s just a shame: you put a lovely trout, flounder, snapper, bronzino or sea bass filet on the grill and cook it perfectly… until you try to lift it off the grates and onto your platter. The skin sticks to the grill, the fillet breaks, and the fires below engulf half your dinner.

There is a simple fix hat not only solves the sticking problem, it also makes the fish taste even better. Look at the picture above: see those slices of orange? They could also be lime or lemon, and the idea is to set those on the grill first, and place the fish on top of them. The citrus isn’t nearly as fragile as the fish, and won’t stick the same way. The thin slices raise the fish up just enough– but not so much that you lose the great grill flavor.

Below is a recipe for cooking trout this way (which I love). You can easily adapt it to other fish; simply adjust your cooking times based on the thickness of the filet.

To learn more about cooking fish on the grill, check out the online video class called Fire up The Fish, starring none other than my husband, David Bonom. You can get the video for 25% off by ordering it through this link.

Print Recipe
Grilled Orange Dijon Trout
Servings 4
  • 1 tablespoon chopped fresh parsley
  • 1 teaspoon chopped fresh oregano
  • 1 teaspoon chopped fresh thyme
  • 1/2 teaspoon salt
  • 1/8 teaspoon black pepper
  • 2 tablespoons extra virgin olive oil
  • 1/2 teaspoon Dijon mustard
  • 2 large oranges
  • 4 (6-ounce) trout filets
Servings 4
  • 1 tablespoon chopped fresh parsley
  • 1 teaspoon chopped fresh oregano
  • 1 teaspoon chopped fresh thyme
  • 1/2 teaspoon salt
  • 1/8 teaspoon black pepper
  • 2 tablespoons extra virgin olive oil
  • 1/2 teaspoon Dijon mustard
  • 2 large oranges
  • 4 (6-ounce) trout filets
  1. Heat the grill for direct heat, medium high (400F) cooking.
  2. Combine the parsley, oregano, thyme, salt, pepper, olive oil and Dijon in a small bowl.
  3. Cut 1 ½ oranges across into 8 slices and set aside. Squeeze 2 tablespoons of juice from the remaining orange half and add to the herb mixture. Brush about half of it over both sides of the fish fillets.
  4. Place two orange slices on the grill about 2-3 inches apart; place a trout fillet on top with the skin side facing up. Repeat with the remaining oranges and filets. Grill 4 minutes; turn and brush the flesh side with the remaining orange-herb mixture and grill until the fish is cooked through, about another 4 minutes. Slide two spatulas under the oranges to lift each piece of fish off the grill on top of the oranges.
Recipe Notes

Nutritional analysis per serving: 345 calories, 36 g protein, 9 g carbohydrates, 2 g fiber, 18 g fat, 3 g saturated fat, 394 mg sodium

Filed Under: A Sweet and Savory Life, Fast and Easy, How-To, Recipes, Seafood and Fish

Caesar Potato Salad

July 4, 2017 By Marge Perry 3 Comments

For every one who is bored, or not especially enamored with, potato salad (that’s me); and for those (millions) of you who need an easy side dish to serve or bring to their cookout, Caesar Potato Salad is today’s hero dish.

It is as good as it sounds: tender new potatoes tossed in a savory, creamy classic Caesar dressing with the requisite lemon, parmesan, and yes– anchovies. Those little fish lend important depth of flavor without prominent fishiness. (Unless you are vegetarian, I implore you to not leave them out.) Feel free to make the potato salad hours (or even a day) in advance, but toss in the lettuce at the end so it stays bright and crisp.

Make this simple dish, and it will make you a cookout hero.

Happy Fourth of July!

Print Recipe
Caesar Potato Salad
Servings 8
  • 3 pounds small red potatoes, cut in 1-inch pieces
  • 2 anchovy fillets
  • 1 small garlic clove, very finely minced
  • 1/4 cup extra virgin olive oil
  • 2 tablespoons lemon juice
  • 1 teaspoon salt
  • 1/4 teaspoon black pepper
  • 1/2 cup grated parmesan
  • 2 cups thinly shredded Romaine lettuce
  1. Cover the potatoes with 2 inches of cold water in a large pot and bring to a boil. Boil until fork tender, about 10 minutes. Drain.
  2. While the potatoes cook, mash the anchovies with a fork in a large bowl. Add the garlic, olive oil, lemon juice, salt and pepper and whisk until creamy looking. Stir in the cheese. Add the warm potatoes and Romaine to the bowl and gently toss until the potatoes are well coated. Allow the salad to stand at least 5 minutes before serving. (This allows the potato to absorb some of the dressing.)
Recipe Notes

Nutrition per serving: 205 calories, 5 g protein, 3 g fiber, 9 g fat, 2 g saturated fat, 449 mg sodium


Filed Under: Fast and Easy, Grains and Starches, Great for Gatherings, Recipes, Salads, Side Dishes, Vegetables

  • « Go to Previous Page
  • Page 1
  • Page 2
  • Page 3
  • Page 4
  • Page 5
  • Go to Next Page »

Primary Sidebar

I make my living writing, teaching and speaking about food and travel. In the name of work, I (have to!) eat a lot, meet interesting people (many of whom, like me, are passionate about their work) and travel near and far to see where and how food is made, grown or raised. I am saved from a life of extreme obesity by the fact that I truly love to exercise, but I am always one forkful away from not being able to button my jeans. Mine is a sweet and savory life.

I share it with my husband and co-author, David Bonom. Check out our new book, Hero Dinners: Complete One-Pan Meals That Save the Day

To learn more about me, click here →

Subscribe

sign-up here for email updates!

  • Want to see a cool trick for poaching eggs? Check out this video we did for Anolon. The trick comes at :22!

  • Craftsy Blogger Awards - Winner Best Tutorials Badge

    Popular Posts

    How to Cook Tender, Juicy (not dry!) Chicken Breasts

    Grilled or Roasted Spice-Rubbed Chicken Thighs: My Go-To Easy Dinner

    Strawberry Frosted Cupcakes

    Disclosure statement

    Do you have Chicken Anxiety??

    Become a Chicken Master! Make moist, tender, juicy, safe chicken each and every time. My online Craftsy video class, All About Chicken will show you how. Click here to learn more-- and get a special reader discount of half price.

    Footer

    Hero Dinners: Complete One-Pan Meals That Save the Day, our latest cookbook, is available wherever books are sold (including on Amazon).

    Want to see more of my work? Click on "Articles" at the top of the page for links to our recipes, articles and videos in magazines, websites, and social media.

    Feel free to connect/follow via any of the social media buttons below or drop me a line here through my contact page. Read More…

    More From the Blog

    Subscribe

    sign-up here for email updates!

    Copyright © 2026 asweetandsavorylife