
Bronzino, (aka branzino, bronzini), striped bass and red snapper are all at their very best– moist and tender, with lovely mild flavor– when roasted or grilled whole. They’re a cinch to prepare, too. The only problem is, after you cook them, they must be filleted– because no one wants to have to dig around the chewed up fish in their mouth to extract those sharp little bones.
First, I’m going to give you a recipe for cooking a whole bronzino on the grill. The recipe is ingenious: it uses a method that guarantees your fish will not stick to the grill. You can use the same method for other round fish, like snapper and striped bass. To see a video of this method (as well as video instructions on how to grill many other types of fish), check out the Craftsy video my husband David Bonom just produced. (It’s called Fire up the Fish)
Following the recipe below are the very detailed step-by-step photos and directions for boning a whole cooked fish. But first you need to cook it.


Grilled Bronzino
2 lemons
whole cleaned branzino (Mediterranean sea bass), each about 1 3/4 pounds
1/2 teaspoon salt
1/4 teaspoon black pepper
6 sprigs parsley
6 sprigs fresh thyme or oregano
1 tablespoon plus 1 teaspoon extra-virgin olive oil, divided
1. Light grill for indirect cooking.
2. Cut 1 1/2 lemons across into 8 thin rounds. Squeeze the juice of the remaining 1/2 lemon into a bowl.
3. Brush lemon juice in cavities of the fish; season the cavities with salt and pepper and fill with parsley and thyme.
4. Coat entire outside of both fish with 1 tablespoon of the oil. Brush remaining 1 teaspoon oil on both sides of lemon slices.
5. Wipe or brush the grill lightly with oil; place the lemons in two rows over indirect heat across the grill grate and place a fish on each row. (The lemon acts as a rack for the fish and prevents them from sticking to the grill).
6. Grill 15 minutes; turn the fish over on the lemon slices and grill until the fish flake easily with a fork, another 15 to 17 minutes. Makes 4 servings.
Nutritional analysis for each serving: 223 calories, 7 g fat, 1 g saturated fat, 37 g protein, no carbohydrates or fiber, 426 mg sodium
How to Bone a Whole Cooked Fish
I am going to walk you through every tiny little detail for boning a fish. Please don’t be discouraged by all the steps– I broke it all out for the sake of absolute clarity, but it isn’t hard or complicated. Okay, here we go…
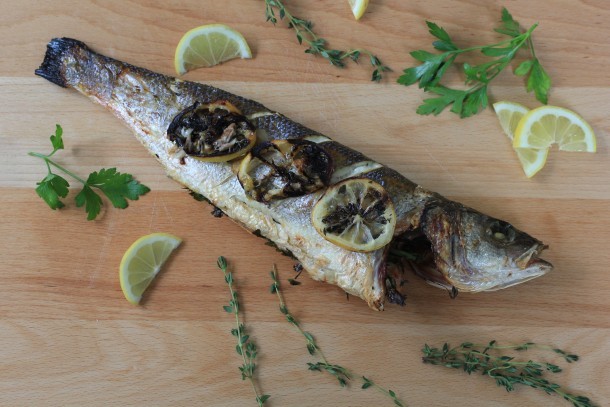
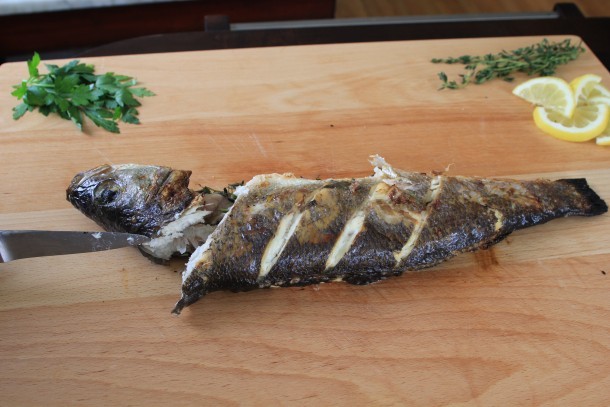
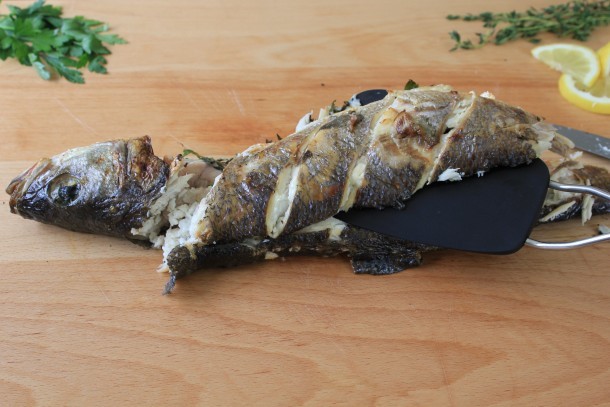
When you took the fish off the grill, it looked like this. (I placed the grilled lemons, which served as a rack to prevent the fish from sticking to the grill, on top of the fish.)
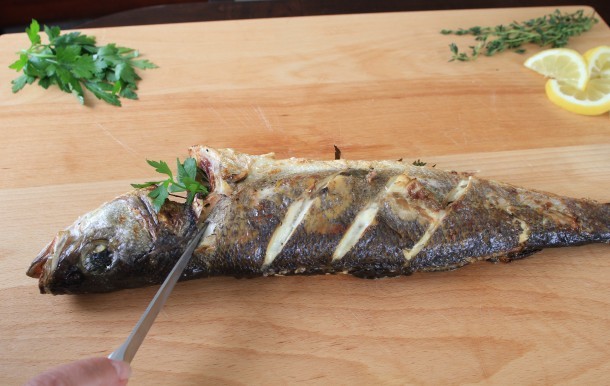
Place the tip of your knife just at the base of the head. You will feel a bone that runs across the fish along the base of the head from the back to the belly. Cut right along this bone.
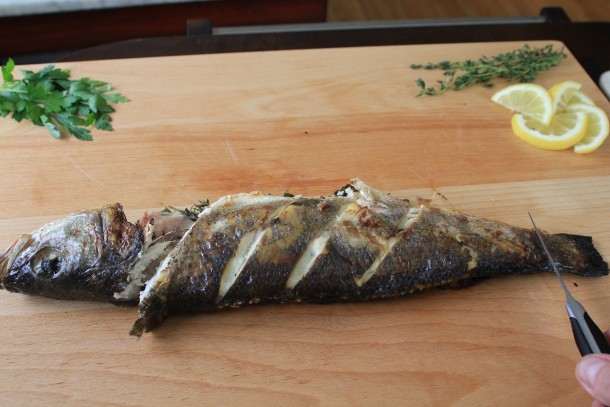
As you cut through toward the belly, you will come to a triangular shaped bone called the collar. Cut around the collar to remove it. In the first photo, my knife has gone as far as it can before it hits the collar.
Here you can see the collar.
Don’t try to cut through to the bottom of the fish and the other side of the collar. Tilt the head down, but allow it to remain attached. (If you try to remove the head completely at this point, you are likely to leave a small section of tiny and very annoying pin bones.)
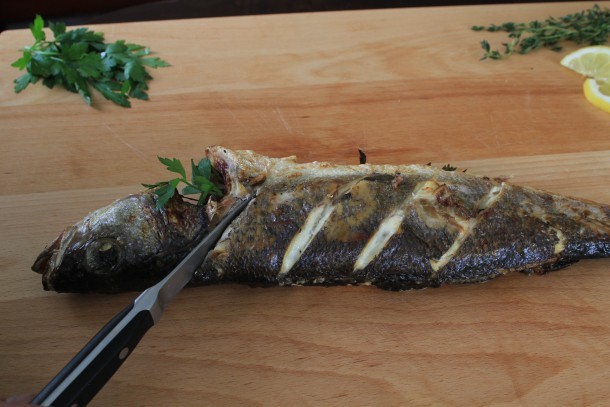
Cut straight across to remove the tail.
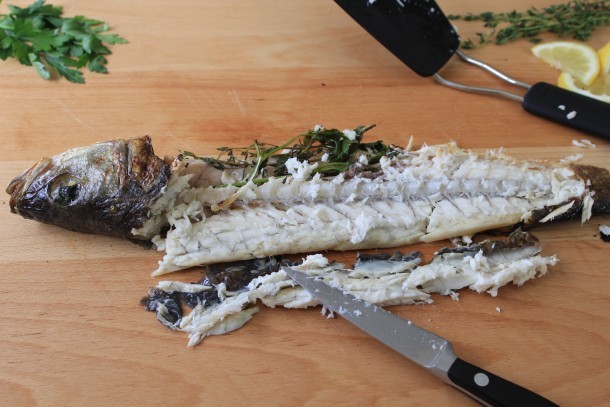
Now comes my second favorite part of the job; removing the top fillet. Place the tip of your knife into the the top of the back, resting it just above the backbone. The blade is parallel to your work surface and resting right on the backbone.
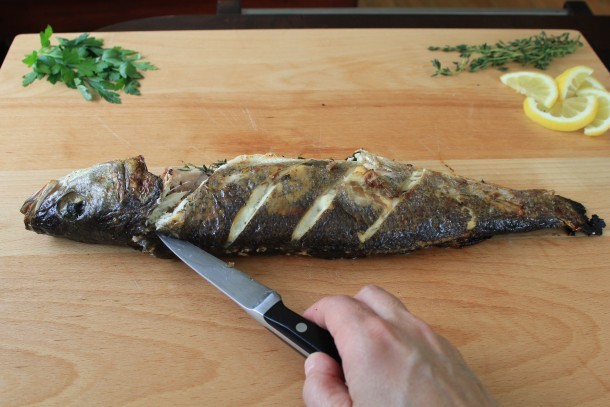
Continue cutting down along the center of the back, keeping the knife resting right on top of the backbone. See how it looks slightly messy on the lower half? Don’t worry– it will look great by the time we serve it.
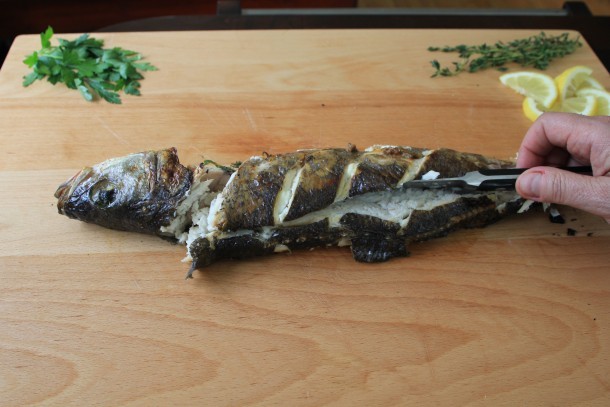
Now that the top fillet is completely separated, lift it up with a large spatula, such as this offset one. (“Offset” means the handle is set off from, or at an angle to, the big flat surface of the spatula.) Place the fish, skin side up if you like, on your platter. If you don’t like to eat the skin, you can very easily pull it off.
Before you remove the backbone, notice that along that back edge (where you inserted your knife just now) is a long thin section filled with tiny bones. It separates easily from the main part of the fillet– you can really just push it off the fish with the edge of your knife. There is a little bit of waste here, because you will lose a little of the flesh, too– but it is well worth it to avoid eating those nasty pin bones.
Here’s the best part: it’s time to lift the back bone right off. There’s something quite rewarding about this step. Every time I do it, I hear the NASA announcer saying “And… we have lift off!”. (Maybe I shouldn’t have shared that part.)
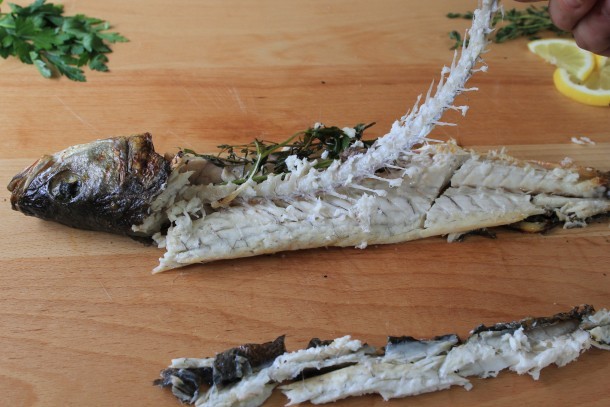
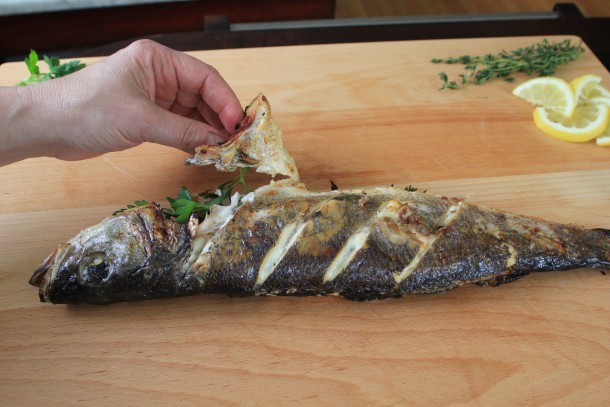
Okay, so now you pull off the back bone, and with it comes the head. This may be set aside so you can admire your work or immediately discarded.

Remove the herbs that were inside the cavity. Remember the collar that was on the top fillet? It’s here, too, and you need to remove it.
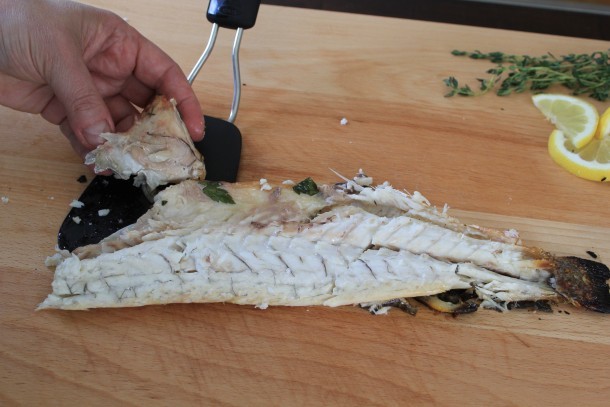
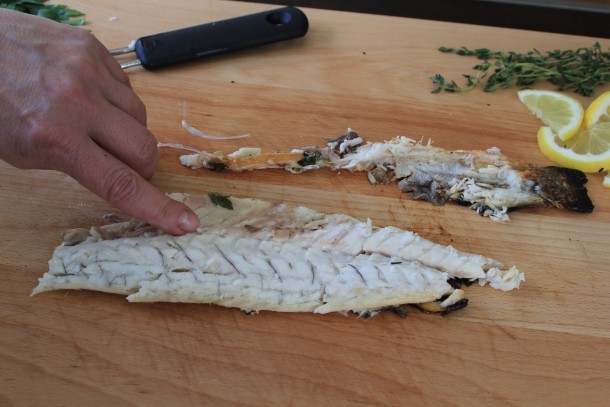
In the picture above, I am sure you noticed those reviled pin bones along the outer edge of the fillet. Cut along that edge, lengthwise, to remove them.
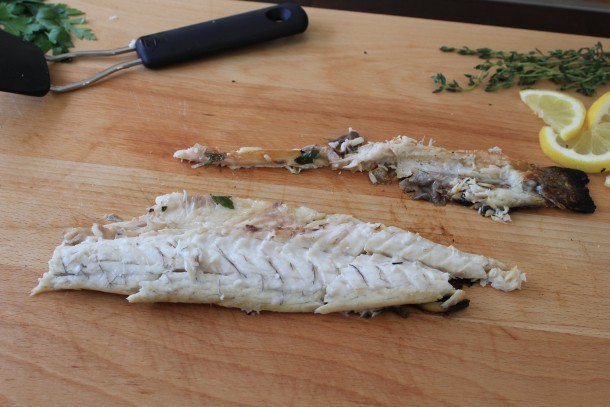
Run your fingertip along the fillet and you are sure to find at least one or two bones lurking. Pull them out with your fingers. Or, do it the way the waiter at the Italian restaurant does it when he bones the fish table side: place your knife (or spoon) along one side of the bone and another spoon or napkin on the other side as you pull it out.
Use that same large offset spatula to transfer this fillet to your platter.
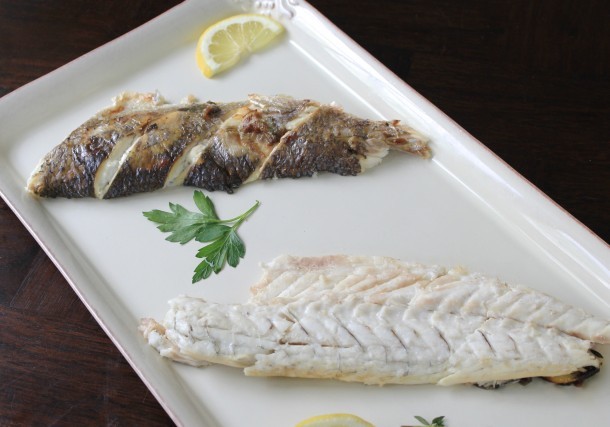
One last thing…it’s nice but not necessary to “pretty up the fillet” by gently cleaning off the little bit of mess we may have left. To be visually explicit, in the photo just below you will see the “uncleaned” fillet. Not only is there a bit of parsley left, but the top of the fillet has a little pinkish-brown clumpy looking stuff. Just gently scrape it off with your knife if you want the fish to look absolutely perfect. Or don’t– it will taste just as good either way.
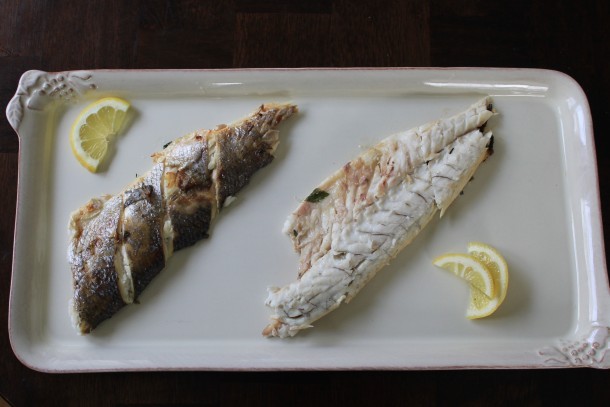
Also, you may remember earlier that the skin on the first fillet looked a little scraggly. No worries– I just tucked it under , the way you’d tuck a sheet under a mattress. So here are the final fillets the way I’d serve them. They look moist, with crackly crisp skin, and tender, white flesh.
All of this boils down to these basic steps:
1. Cut away the head (but don’t cut through the backbone). Remove the tail.
2. Cut through the top of the fish along the backbone; lift off the top filet.
3. Remove the backbone and head in one piece. Admire your work.
4. Clean off pin bones along the edges; check for bones on the center of each fillet.
After you fillet a fish the first time, I promise it gets easier. As with most things in life, your first time may take you a little longer, so drape that first fillet you remove with foil to keep it warm while you work on the second one. And if you really want to buy yourself some practice time, have a warm topping, such as slow-cooked caramelized onions, over low heat on the stove. When you put the warm topping on the fish, diners will perceive the fish as warmer.
Finally, let’s say something goes awry and your fillets are not up to your usual standards of perfection. Place a lemon slice or sprig of fresh herb over any little ‘issues’ — everyone will still ooh and aah.
You are a very brave woman, Marge! Quite impressive. 🙂
Nicely done Marge! Your photos show even a novice how to cook and take apart a whole fish. Let’s go fishing and try out your instructions.
I’ll go fishing, Kurt! Name the date 🙂