This is a cry for action: People, please stop overcooking your corn! Fresh, sweet summer corn deserves our respect (after all, it was here before we were) and only needs a very few minutes of our attention. And while I’m on the topic of corn abuse, you corn strippers out there ought to be ashamed. You pull the husk away like it is a lover’s snap-front bodice—and to what end? You don’t learn anything from the lower part of the ear that wasn’t obvious from the top two inches– and when you strip the husk off, the corn starts to lose its sweet sugars.
The Best Way to Select and Store Fresh Corn
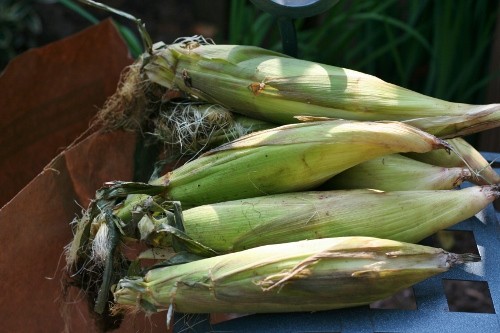
Let’s go back to where the corn gets its start: in the field. The very moment it is picked, the natural sugars in corn begin converting to starch. Within one day nearly half the sugars of room temperature have turned to starch. Obviously, it is ideal to buy corn at a farmer’s market a few steps from the field, and it’s best if it has been stored in cool shade. But if you, like me, buy most of your corn at the supermarket, don’t despair: it may still be fresh. Feel an ear: cool is good. If the only corn left in the market is from the bottom of what used to be a great big pile, chances are it got warm snuggled beneath its brethren all day, and won’t be as sweet. If the corn is flying off the shelves, chances are it moved from the refrigerated produce storage room to the bin to grocery carts very quickly, and has retained more sugars.
(And by the way, as I mention, stripped corn loses its mojo fairly quickly—so those ready-to-cook ears on Styrofoam trays wrapped in plastic won’t be very tasty.)
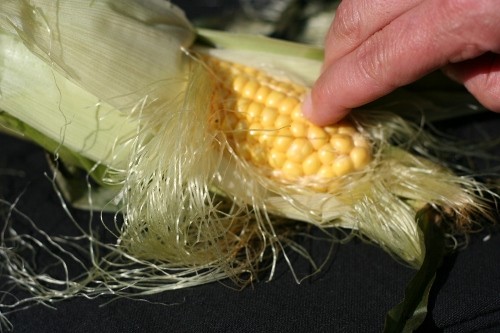
Now that I’ve told you what not to do, here’s how to tell if corn is fresh. Pull a small section of husk down about two inches. Don’t worry if the kernels at the very top are white and hard and dry. Look at the first five or six rows of fully formed kernels—you can be 99% sure the rest of the ear will look just like those. Poke a kernel with your fingernail: a drop of milky white liquid should spurt out.
Bring the corn home and store it in the refrigerator, preferably in a paper bag. The bag, while porous enough to let the corn breathe, helps prevent the loss of moisture, and also keeps the corn from readily picking up refrigerator odors.
How to Boil and Grill Corn
Corn cooks quickly, and when it is overcooked, it gets tough, chewy and starchy. Err on the side of undercooking, and I bet it will come out just right.
I’ve used the methods below for years, but last week I decided to test them side-by-side. Here is the technique I recommend for each method:
[print_this]
To Boil (Steam) Corn
This method produces the sweetest, most tender corn. This is my method of choice when I want to celebrate the pure, simple flavor of fresh-from-the-field corn. (Or when it’s raining and I don’t want to grill!) I typically season really fresh steamed corn only with salt and pass the butter.
- Strip the corn of husks and silk.
- Bring 1-2 inches of water to a boil in a large pot. Add the corn, cover the pot and cook, tossing once or twice, for 3-4 minutes, until kernels are brightly colored and crisp-tender when poked.
Note: there is no need to bring a lot of water to a boil. Just an inch or two produces enough steam to cook as many ears as will fit in the pot. Be sure to move them around after a minute or so to ensure the ears on top have a chance to be closer to the steam.
Also, don’t add salt to the cooking water; it toughens the corn. Add salt after the corn is cooked.
[/print_this]
[print_this]
To Grill Corn
Method 1: In the Husks
Corn grilled in the husks has a more pronounced corn flavor; it is less sweet than boiled corn, and a little chewier. I prepare it this way when I am going to add bold flavors to the corn—slather it in chipotle mayonnaise, brush it with lime butter, or roll it in Asiago, for example.
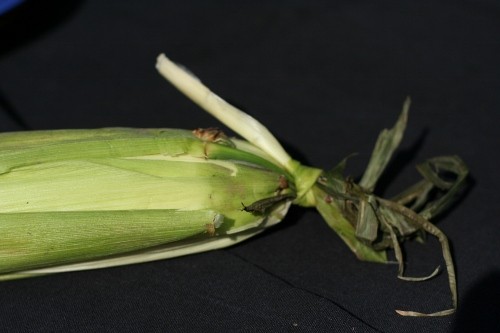
- Pull back the husks, leaving them attached to the ear at the bottom. Remove the silk, and fold the husks back up over the corn, tying it closed at the top. (I often use a long strip of husk as the tie).
- Soak the corn in a large bowl of cold water (or the sink) for about 7-10 minutes. Place on the grill over direct heat and grill about 8 minutes, turning occasionally.
[/print_this]
Note: I tested grilling corn in the husks without soaking it, and the kernels were chewier, had a more pronounced “corn” flavor and were much less sweet. If you’re going to eat corn on the cob, I don’t recommend it. (I might use this method if I were going to puree the corn and use it to add pronounced corn flavor to a dish.)
[print_this]
To Grill Corn
Method 2: Stripped
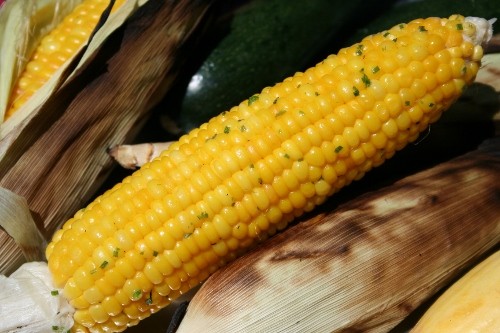
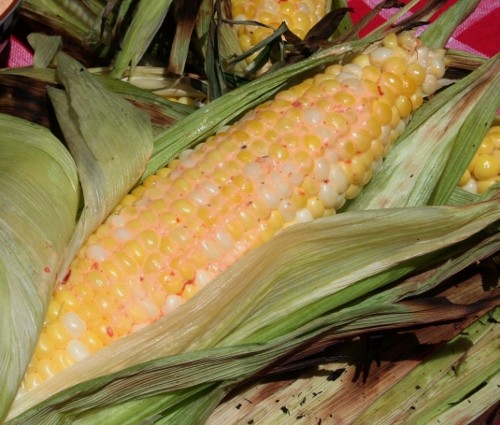
Stripped, grilled corn has an intoxicating smoky-sweetness. The little bit of charring caramelizes the surface sugars and adds smoky depth. Corn prepared this way can be served just lightly seasoned—but also stands up well to bold flavors.
- Strip corn of husks and silk. Place on the grill over direct heat and cook, turning each time the underside is lightly marked, for a total of 5-6 minutes.
[/print_this]
[print_this]
Grilled Corn with Herb-Lime Butter
4 tablespoons butter, room temperature
2 teaspoons chopped fresh cilantro
2 teaspoons chopped fresh mint
2 teaspoons lime juice
1/2 teaspoon lime zest
1/4 teaspoon salt (or more to taste)
6 ears corn
- Prepare grill for direct heat grilling.
- Combine softened butter, cilantro, mint, lime juice and zest, and salt. Place butter on waxed paper or parchment and roll into a log. Refrigerate.
- Pull husks back but do not remove; pull out silk and replace husks, twisting or tying at the top to close. Grill over direct heat, turning occasionally, for about 7-10 minutes, or until corn kernels are just tender when pierced with a fork.
- To serve, cut butter into six “pats” and serve a pat with each cob.
Makes 6 servings
Nutritional analysis per serving: 142 calories, 4 g protein, 18 g carbohydrates, 2 g fiber, 8 g fat, 4 g saturated fat, 98 mg sodium
[/print_this]
[print_this]
Grilled Corn with Chipotle Mayonnaise
8 ears corn
1 tablespoon canned chipotle chili in adobo sauce
1/2 cup light mayonnaise
- Prepare the grill for direct heat cooking.
- Pull husks back but do not remove; pull out silk and replace husks, twisting or tying at the top to close. Soak in a bowl of cold water for 7-10 minutes.
- Grill the corn over direct heat, turning occasionally, for about 7-10 minutes, or until corn kernels are just tender when pierced with a fork.
- Meanwhile, mince the chili and stir it into the mayonnaise.
- Either remove the husks and brush the corn with the mayonnaise, or serve the corn in the husks with the mayonnaise on the side.
Makes 8 servings
Nutritional analysis per serving: 129 calories, 3 g protein, 19 g carbohydrates, 2 g fiber, 6 g fat, 1 g sat fat, 160 mg sodium
[/print_this]


Thanks! Great tips. Can’t wait to try this.
The photos are wonderful!
I CAN’T WAIT TO TRY THE RECIPES. THEY SOUND GREAT!
Is there anything better than sweet corn fresh of the stalk? To salt or not to salt that is the question ! I grew up in Upstate NY (Rochester-that is) and they had oodles of sweet corn, fresh from the farm- just minutes from my home. I’m glad that we are still able to get wonderful corn here in Northern NJ.
Now see, Amy, I always salt, but do not always use butter…
These are great techniques, but what about microwaving corn? I have a relative that swears by this. You leave the husks on and let them cook in their own moisture; 1 and 1/2 minutes on high for one ear, 3 minutes for 2 ears, etc. It seems to me this would be a great time-saver since you don’t have to wait for the water to boil. Plus, the corn would retain its nutrients rather than allowing them to seep in to the boiling water.
I have heard about microwaving corn on the cob before, and your note reminds me that I have to test it out! It is a little faster (although one-inch of water in a large pot comes to a boil very quickly), but i am especially interested in what happens to the texture and flavor. I’ll let you know! Or– if you test it first, please post back and tell us what you think.
Thanks so much for the corn info and wonderful recipes….will definitely try these this summer.
Looks and sounds yummy!
Great tips, as always!
I have used the microwave technique, and I find it quite nice and super easy on a busy night!
This post is so timely, as I revisit a salad with grilled corn. I have learned so much! And, I love the pic that shows the milk. The Grilled Corn with Herb-Lime Butter? Destined to be made….soon. 🙂