We started our kitchen renovation the day we moved in. Within weeks, the builder was an major part of our daily lives: he talked to me while I made our bed in the morning, grabbed the dog dishes at feeding time, changed lightbulbs and helped me in with the groceries. It was almost like having two husbands, which was just fine with me.
Let me back up. As regular readers of this blog know, my real husband, Ebo (that’s his nickname, and here’s how he got it), and I make our living developing recipes and food, health and travel-related content. Our corporate headquarters is our home, and our two dogs and a cat serve as the board of advisors.
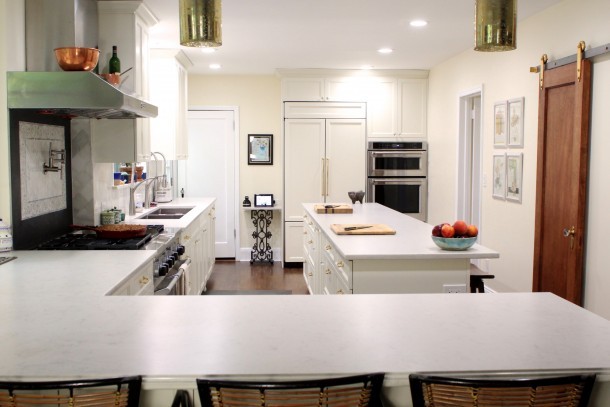
After living and working in one house for 15 years, we decided to buy a new one and create our dream kitchen. Eight months of dust, debris, set backs and unexpected happy “finds” later, we really, truly love the end result. So did our editors at Rachael Ray Every Day, who are featuring our kitchen in the current (September 2016) issue.
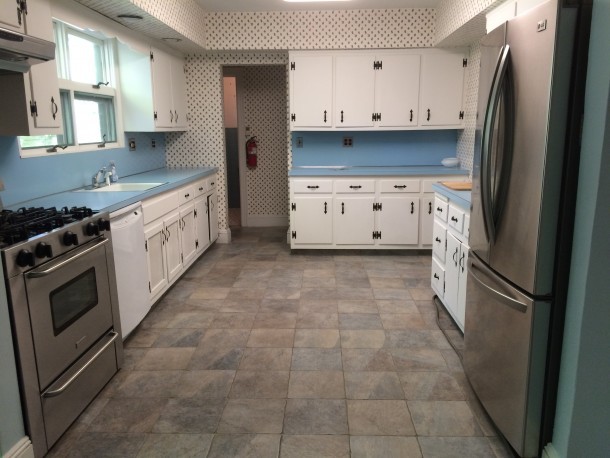
Let’s start with the kitchen as it was. It had barely been touched in over three decades.
The amount of raw space was good, but the layout was not. Our big-picture goal was to make the kitchen function equally well as our professional lab– and the heart of our home. Our kitchen has to easily accommodate two cooks on a daily basis, and also be there for us when, a couple of times a year, we throw parties for 40-50 people. We are the crash test dummies of kitchens, and we need materials that can stand up to our vigor with grace and beauty.
We know it’s asking a lot, but we also know it’s doable. This is the story of how came to be. If you want to go straight to why and how we chose the specific materials, design and product, here are some links: (countertops; floors, appliances and cabinets; and sinks) and they appear again at the bottom of the page. If you want to read about the renovation process, from concept to a creepy-happy surprise to dust-and-despair to final product, stay on this page.
Every renovation begins with goals. Ours were:
- Create more surface area for prep– and keep our individual areas easily dividable (to accommodate our very different work styles and keep our relationship intact.)
- Maximize storage– and keep everything accessible and easy to see.
- Use the existing location of gas and plumbing lines to help contain costs.
- Keep all surfaces easy to clean without fussy specialty products or procedures.
I planned and re-planned, drawing the layout on old-school graph paper into the wee hours, often coating our bed sheets in a thin layer of eraser shreds. Our builder, Shlomo Kadosh, and I would take and re-take measurements almost daily, and just as often, Shlomo would remind me that the measurements might change once his work began.
Yeah, they changed. The beauty of (and frightening thing about) an old house is that you never know what you’re going to find. Our renovation didn’t include anything structural– we were working within the existing space and replacing cabinets and appliances. Ha! It sounds so simple…
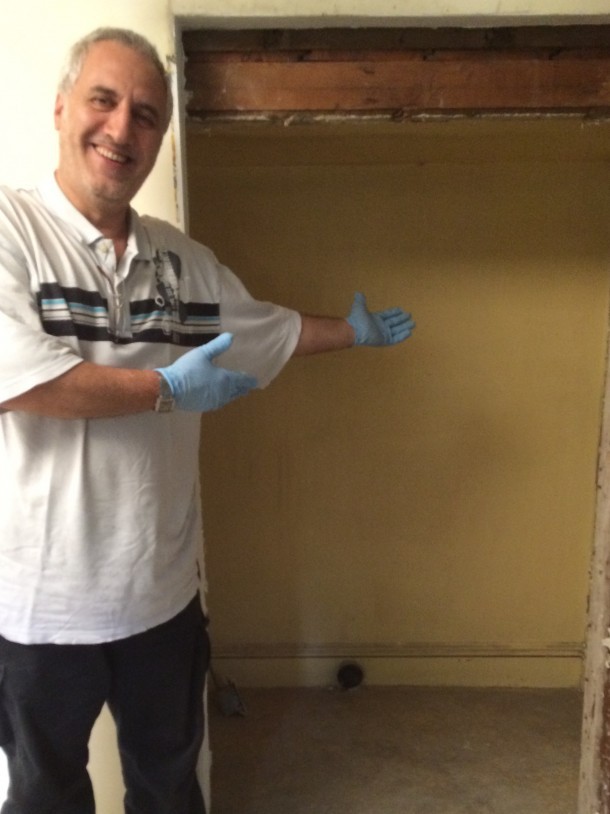
When Shlomo pulled the existing refrigerator away from the wall, there was a little hole in the sheetrock behind it. He shined his flashlight in. We knew that we should be looking underneath the back staircase, and in fact, we’d planned to build some under-stair storage. Instead, he found was a strange little room, complete with flooring and baseboard moulding, that had been sealed closed with a wall of sheetrock.
So very creepy.
There were no dead bodies in the room. Better: I got a second walk-in pantry. For a glimpse into the super cool use we made of the space, and how we paid homage to the hidden room, stay tuned for the upcoming pantry post. (For organization geeks, it’s pornographic).
As anyone who has gone through it knows, renovation is hard. It is exciting, but it also tries your patience, makes concentrating on anything else fairly difficult, is extremely time consuming, dirty, messy and noisy. But it was easy for us humans compared to what our dogs went through.
Jake, the more timid of the two, spent a lot of time crouched under our bed, hiding from the men and the noise. I also found him hiding in the basement behind the boxes. Sometimes I wished I could hide there, too.
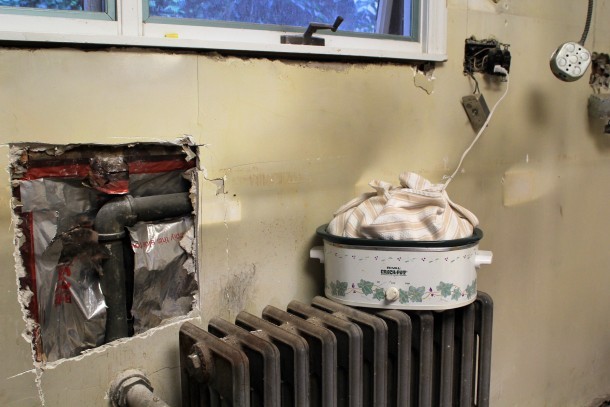
But we were too busy trying to earn the money to keep kibble in their bowls to cower behind boxes. So we had to develop recipes while the kitchen was under construction. Sometimes, our work looked like this.
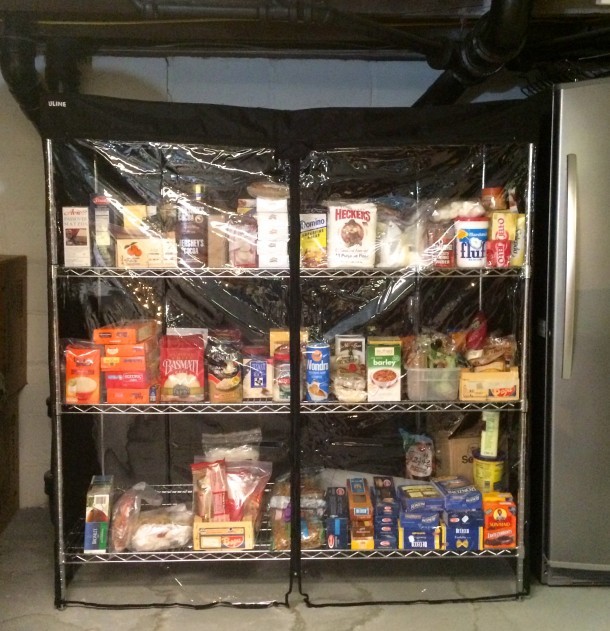
We also had some nifty tricks to keep organized in the midst of the chaos. A couple of them worked really well. Others…not so much. Here’s one of the good ones: we moved our pantry items onto shelving with zipped covers. (After the renovation, these shelves are great in the basement, attic and garage to keep dust off seasonal items, party goods, and less frequently used small appliances.)
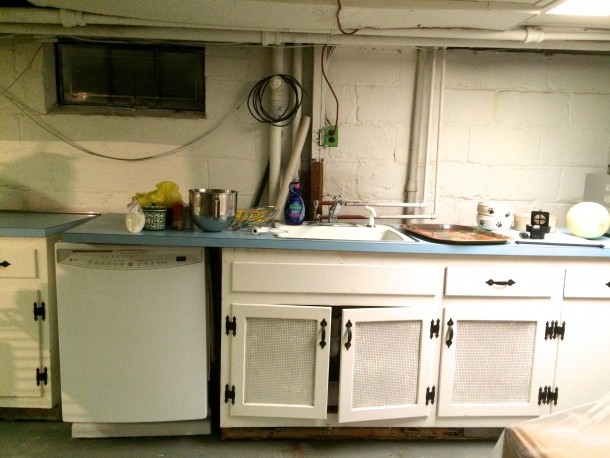
What didn’t work so well was our ongoing attempt to prep food in the basement. There was already a sink down there (some kind of long-abandoned wet bar, we think), so we figured we could do our chopping and cleanup there, too. Good idea number two: We had the workers move the old cabinets and counters to the basement. Not so good: the area we could set up in is directly under the real kitchen. Directly. Many days while we sliced and diced, the dust from upstairs rained down on our heads. And our food.
(By the way, don’t be fooled by the presence of the dishwasher– that just held up the counter.)
We do believe the slow cooker is a renovator’s best friend. Do your prep before the workers arrive, plug it in somewhere– as far away from the dust as you can– and then when they leave you’ve got dinner ready.
Our other best friend was our dream. It’s like being in labor for 24 hours, which is really tough– but you push through (no pun intended) because you know something really great is on the other side.
In addition to designing the basic layout, there are a million materials choices to be made in a renovation. Some we knew going in, and others we chose once the renovation was underway. In many cases, we were able to partner with manufacturers because our kitchen is often used for photography.
Here are links to the posts about the myriad of materials and products that go into the making of a dream kitchen. For renovators and kitchen dreamers, I hope the links are useful.
Coming soon! Pantry Porn: How to Love Your Pantry Like It’s Never Been Loved Before
Just the (Kitchen) FACs, Ma’am: Floors, Appliances and Cabinets
Please note: We partnered with many companies, including Silestone, KitchenAid and Elkay, to produce our dream kitchen, and received goods and services along the way. We chose to work with products that meet our standards for quality, durability, functionality and good looks– and that we are happy to live with for the next 20 years.

[…] Giving Birth to Our Dream Kitchen (and How to Survive Renovation) […]